Table of Contents
はじめに
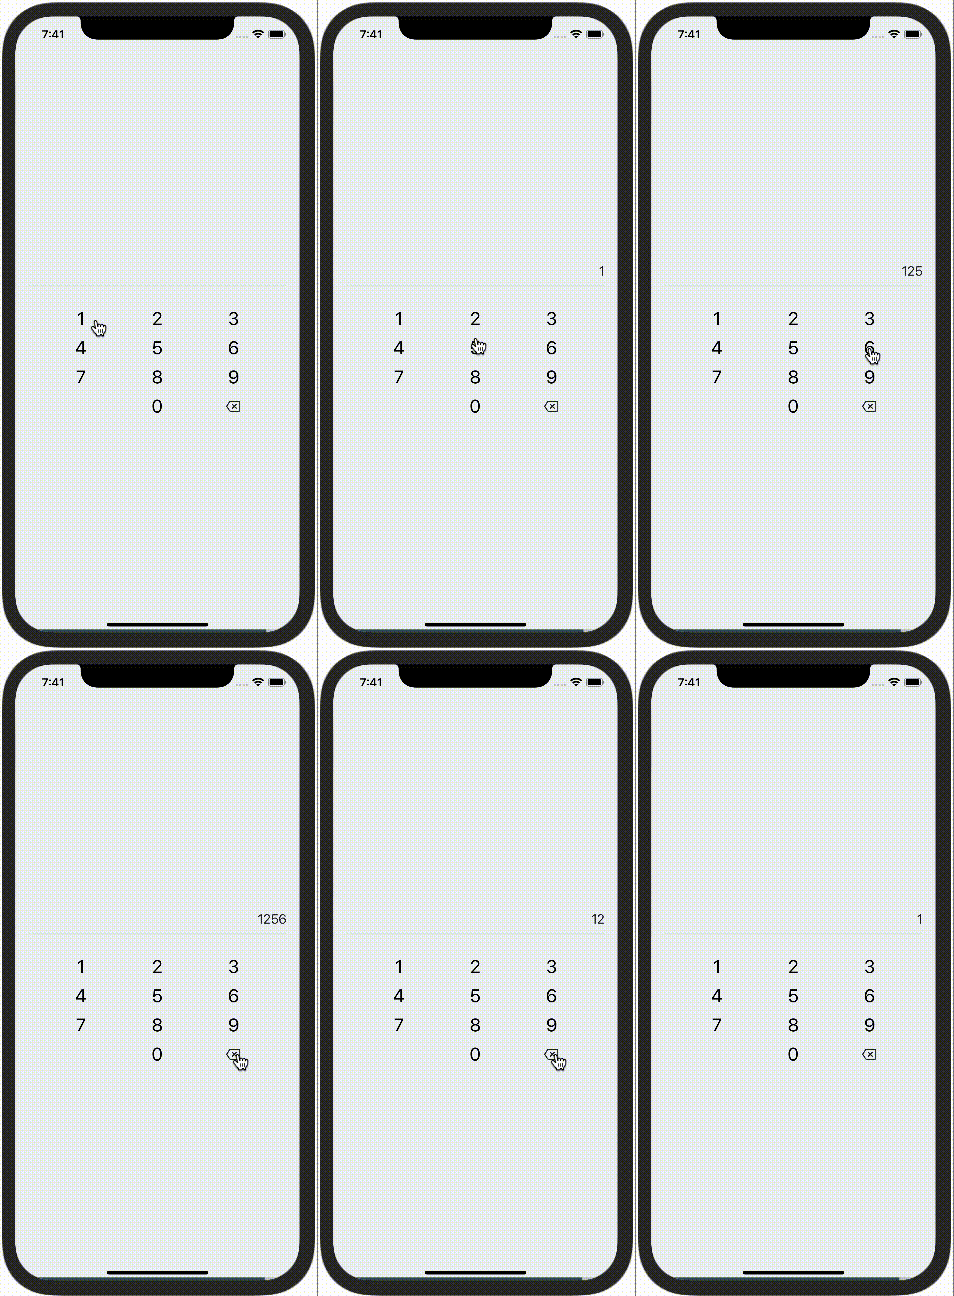
Reat Native(TypeScript)アプリに画面上にバーチャルキーボード(テンキー)を表示させ、入力できるようにしてみます。
react-native-virtual-keyboard というライブラリが既にありますが、コード量的にもそこまで多くなく、自前でもできそうだと思い、自分なりに変更を加えてTypeScriptで実装してみました。
実際に動かせるコードはSnackに公開しています。
react-native-virtual-keyboard-example - Snack
Try this project on your phone! Use Expo's online editor to make changes and save your own copy.
番号表示箇所のコンポーネントを作成
const NumberCell = ({ symbol, onPress }: { symbol: string; onPress: KeyPressEvent }) => {
  return (
    <TouchableOpacity
      style={styles.cell}
      accessibilityLabel={symbol.toString()}
      onPress={() => onPress('number', symbol)}
    >
      <Text style={styles.number}>{symbol}</Text>
    </TouchableOpacity>
  );
};
キーをタップした時のイベント型は以下を想定します。
type ButtonType = 'number' | 'back';
type KeyPressEvent = (buttonType: ButtonType, val?: string) => void;
ButtonTypeがあるのは番号以外にも削除やクリアなど他のキーイベントを扱えるようにするためです。
行部分表示用のコンポーネント作成
今回はテンキーなので3列ずつ表示するための Rowコンポーネントを作成します。
const Row = ({ numbers, onPress }: { numbers: number[]; onPress: KeyPressEvent }) => {
  return (
    <View style={styles.row}>
      {numbers.map((val) => (
        <NumberCell key={val} symbol={String(val)} onPress={onPress} />
      ))}
    </View>
  );
};
削除キーのコンポーネント作成
次に削除キーのコンポーネントです。
const Backspace = ({ onPress }: { onPress: KeyPressEvent }) => {
  return (
    <TouchableOpacity
      accessibilityLabel="backspace"
      style={styles.backspace}
      onPress={() => onPress('back')}
    >
      <Icon type="ionicon" name="backspace-outline" />
    </TouchableOpacity>
  );
};
IconはReact Native Elementsのものを使用しています。
VirtualKeyboardコンポーネントの作成
最後にこれまで作成したコンポーネントを組み合わせてVirtualKeyboardコンポーネントを作ります。
interface IProps {
  onPress?: (value: string) => void;
  value?: string;
}

export const VirtualKeyboard = ({ onPress, value = '' }: IProps) => {
  const onKeyPress: KeyPressEvent = (buttonType, val) => {
    let curText = value;
    switch (buttonType) {
      case 'number':
        curText += val;
        break;
      case 'back':
        curText = curText.slice(0, -1);
        break;
    }
    onPress?.(curText);
  };

  return (
    <View style={styles.container}>
      <Row numbers={[1, 2, 3]} onPress={onKeyPress} />
      <Row numbers={[4, 5, 6]} onPress={onKeyPress} />
      <Row numbers={[7, 8, 9]} onPress={onKeyPress} />
      <View style={styles.row}>
        <View style={{ flex: 1 }} />
        <NumberCell symbol="0" onPress={() => onKeyPress('number', '0')} />
        <Backspace onPress={onKeyPress} />
      </View>
    </View>
  );
};
これで完成です。最後に呼び出して実際に使ってみます。
使用例
import React, { useState } from 'react';
import { View, StyleSheet } from 'react-native';
import Constants from 'expo-constants';
import { Input } from "@rneui/themed";
import { VirtualKeyboard } from './components/VirtualKeyboard';

export default function App() {
  const [value, setValue] = useState('');

  const onPress = (inputValue: string) => {
    setValue(inputValue);
  }

  return (
    <View style={styles.container}>
      <Input value={value} keyboardType="numeric" textAlign="right" />
      <VirtualKeyboard value={value} onPress={onPress} />
    </View>
  );
}

const styles = StyleSheet.create({
  container: {
    flex: 1,
    justifyContent: 'center',
    paddingTop: Constants.statusBarHeight,
    backgroundColor: '#ecf0f1',
    padding: 8,
  },
});

おわりに
バーチャルキーボードを使用することで、OS固有のキーボードによる予期せぬUI崩れ防止や入力制御を行うことができます。 さらに応用することでユーザーに入力させたい値を揃えた独自キーボードも実装することが可能となります。
Related Posts
【Prebuildなし】Expo(React Native)のAmplify Gen2 Quickstartをやってみる 
Daiki Urata
2024/08/02
RailsとrswagでAPIスキーマを自動生成し、ReactのTanStack Queryフックを作成する方法 
Daiki Urata
2024/06/10