Table of Contents
こんにちは。Fusic の藤澤です。
今回は、バックエンドに Rails の API、フロントエンドに Nuxt という構成で Todo アプリを Docker 環境で作って見ました。最終的に AWS Fargate へのデプロイまで行い、記事にする予定ですが、その部分を含むとボリュームが大きくなってしまうためこの記事では環境構築と開発の流れについて触れています。また最後まで見ていただくと下記のデモがローカルで動くようになってますので、少し長くなりますがお時間ある時に読んでみてください。
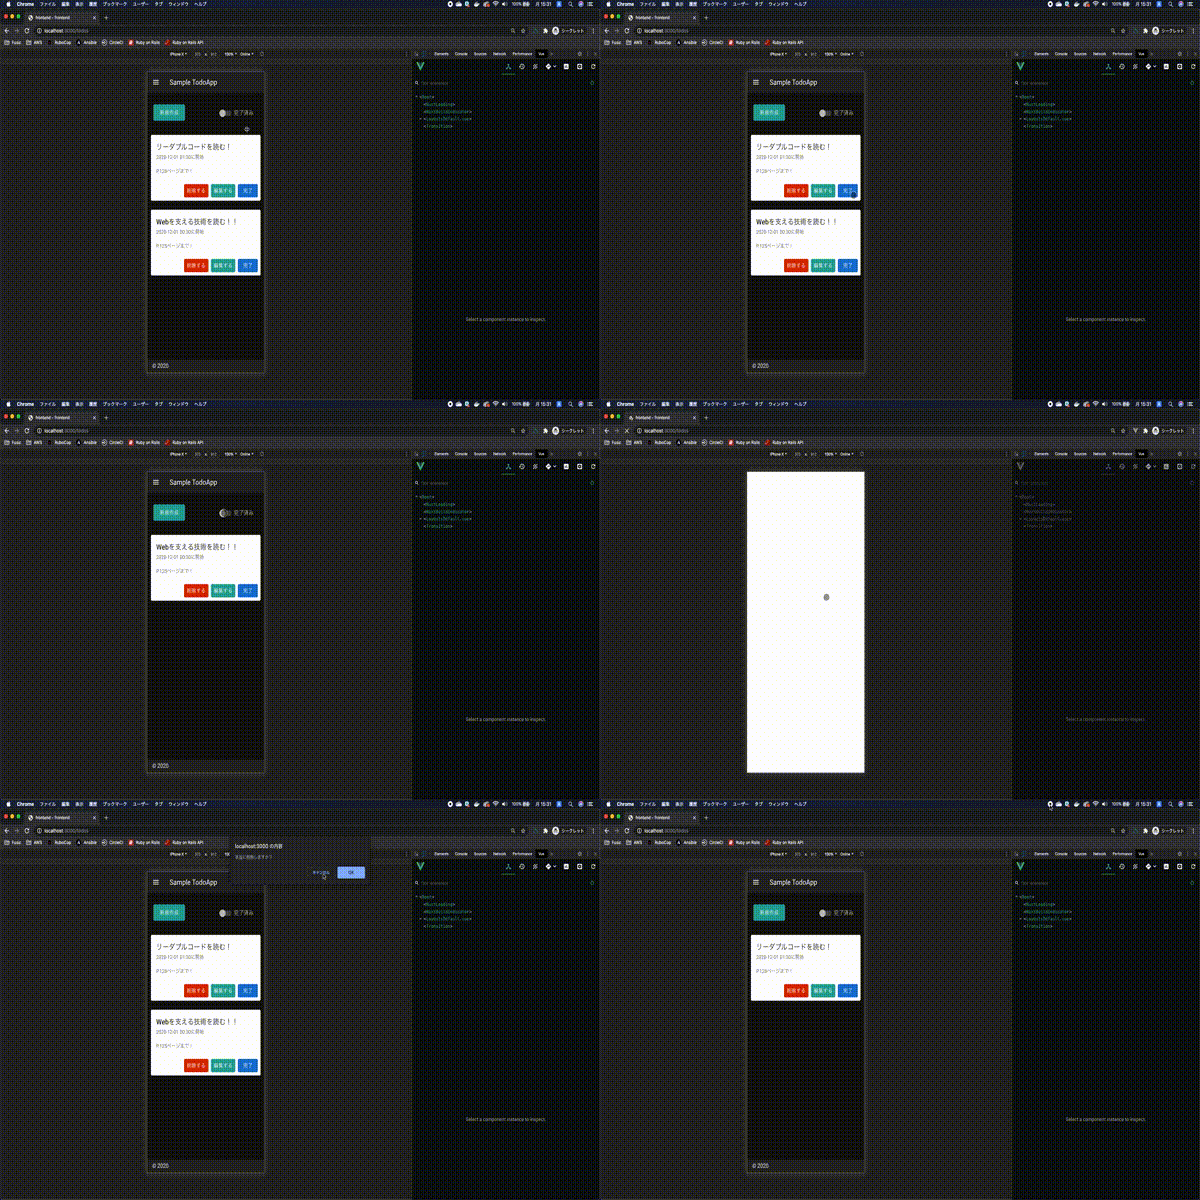
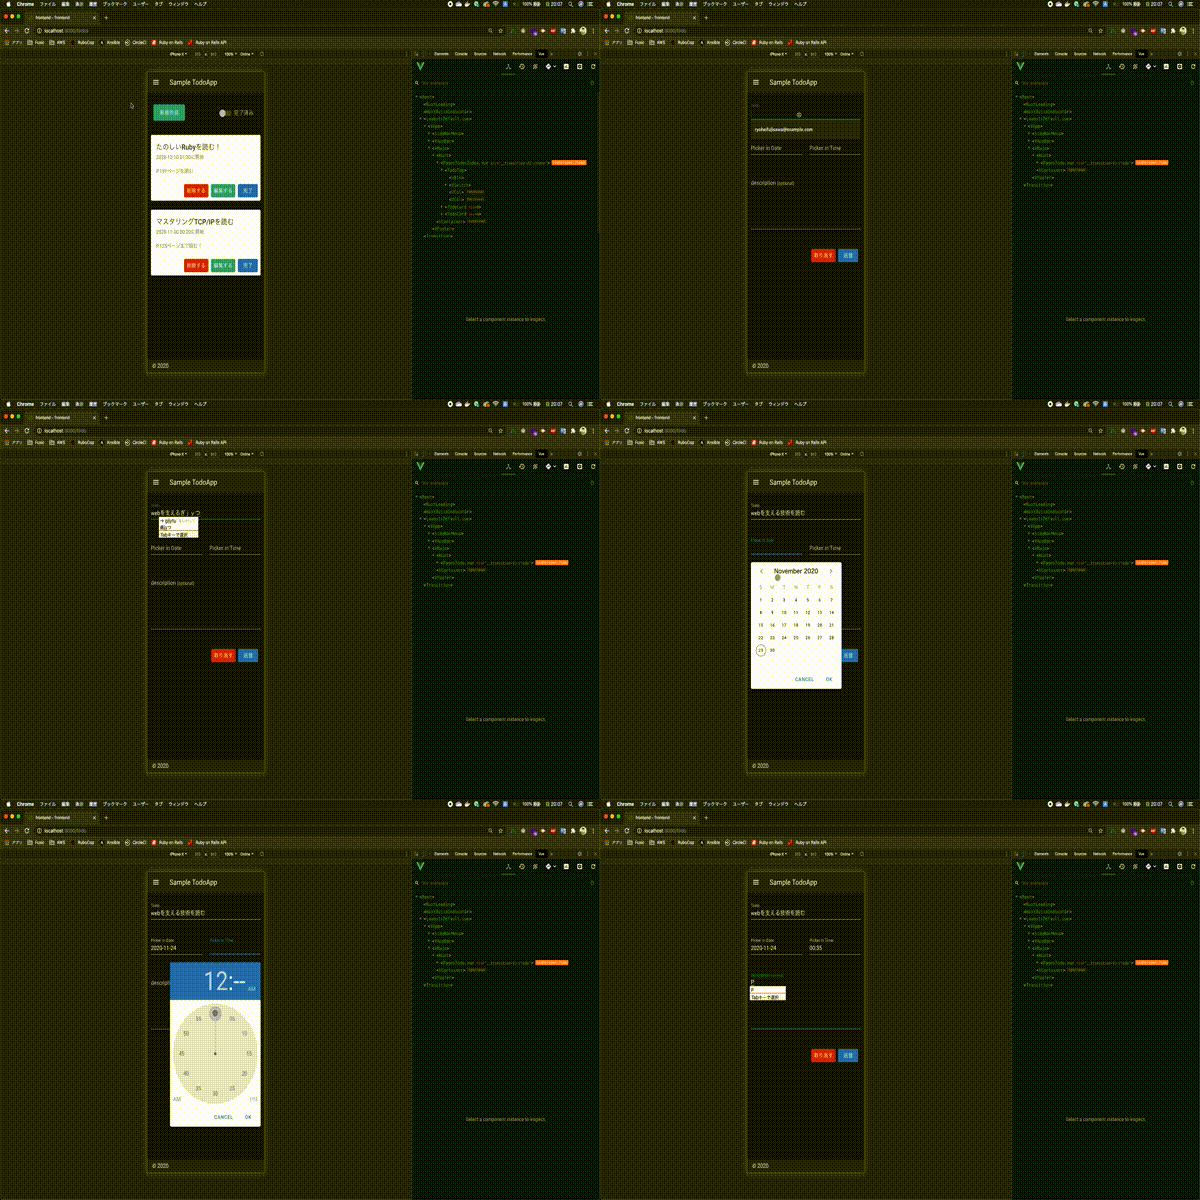
今回作成したアプリ


今回のファイル構成
Rails プロジェクトの中にフロントエンドディレクトリを作成してそこに Nuxt プロジェクトを展開する形にします。
├── todo-app
  ├── frontend
  └── docker-compose.yml
また、下記に今回のプロジェクトのリポジトリも共有しておきます。
今回の流れ
- Rails と Nuxt の開発用イメージを作成
- 作成したそれぞれのイメージを基に Docker-compose でコンテナを起動
- Rails API 作成
- Nuxt で画面作成
環境構築
Rails の環境構築
Rails new
まずは todo-app ディレクトリを作成して作成したディレクトリ以下で下記のコマンドを実行します。
bundle init
作成された Gemfile でrailsの部分のコメントアウトを外します。
# frozen_string_literal: true

source "https://rubygems.org"

git_source(:github) {|repo_name| "https://github.com/#{repo_name}" }

gem "rails"
作成したディレクトリ直下で下記のコマンドで Rails プロジェクトを展開します。今回は API モードでの開発になるので--apiをオプションとして指定します。
bundle exec rails new . --api --database=postgresql
その後作成された Rails プロジェクトで dockerfile を作成します。
作成されたら.gitignore ファイルに下記を追記してインストールしたライブラリを Git の管理対象外にしてください。
todo-app/.gitignore
/vendor
dockerfile 作成
今回の Rails における Docker の運用方針は Gemfile を参照して、予めイメージのビルド時に Gem をインストールしておきます。
その後、docker-compose upコマンドでコンテナ起動時に随時追加した差分の Gem があれば bundle install するといった方針にします。
todo-app/dockerfile
FROM ruby:2.7.0

ENV LANG C.UTF-8
ENV TZ Asia/Tokyo

RUN mkdir /app
WORKDIR /app

ADD Gemfile /app/Gemfile

RUN apt-get update -qq

RUN bundle install

ADD . /app
docker-compose.yml を作成
作成したディレクトリで docker-compose.yml ファイルにコンテナの構成を定義します。
上記の方針に基づいて、backendのcommandでは、ボリュームマウントしているカレントディレクトリのGemfile を参照して bundle install をしています。bundle install 後に、Rails サーバーが起動するようになっています。
このようにすることで、随時追加した Gem の差分のみコンテナ起動時にインストールできるため、起動がスムーズになります。
また今回の運用方針に基づくと、ボリュームマウントの対象となる必要があるのは、アプリケーションのコードと Gemfile です。
マウント対象をカレントディレクトリで指定しているため、このままではマウントする必要のないvendorもボリュームマウントの対象となってしまいます。
vendor ディレクトリ以下には、Gem の実体が保存されているため、この状態だとコンテナ起動に時間がかかってしまいます。
ですので、/app/vendorのように指定して、ボリュームマウントの対象から外しておきます。同じように.git, tmpもボリュームマウントの対象から外しておきます。
version: "3"

services:
  db:
    container_name: todo-app-db
    image: postgres:11.5
    environment:
      TZ: Asia/Tokyo
      POSTGRES_PASSWORD: postgres
    volumes:
      - postgres_data:/var/lib/postgresql/data
    ports:
      - 3307:3306
    networks:
      app_net:
        ipv4_address: '172.10.0.2'

  backend:
    container_name: todo-app-backend
    build: .
    image: todo-app-backend
    command: |
      bash -c "bundle install -j4
      rm -f tmp/pids/server.pid &&
      bundle exec rails s -p 4000 -b '0.0.0.0'"
    tty: true
    stdin_open: true
    volumes:
      - ./:/app:cached
      - bundle_data:/usr/local/bundle:cached
      - /app/vendor
      - /app/tmp
      - /app/log
      - /app/.git
    environment:
      - TZ=Asia/Tokyo
      - TODO_APP_API_HOST=http://localhost:4000
      - TODO_APP_FRONT_HOST=http://localhost:3000
      - CORS_ALLOWED_ORIGINS=http://localhost:3000
    depends_on:
      - db
    ports:
      - 4000:4000
    networks:
      app_net:
        ipv4_address: "172.10.0.3"

networks:
  app_net:
    driver: bridge
    ipam:
      driver: default
      config:
        - subnet: 172.10.0.0/24

volumes:
  postgres_data:
  bundle_data:
docker-compose build コマンドで dockerfile で定義したイメージのビルドを行って下さい。
docker-compose build
その後、docker-compose up コマンドでコンテナを起動して db コンテナでデータベースを作成してください。
docker-compose up
docker-compose exec backend bin/rails db:create
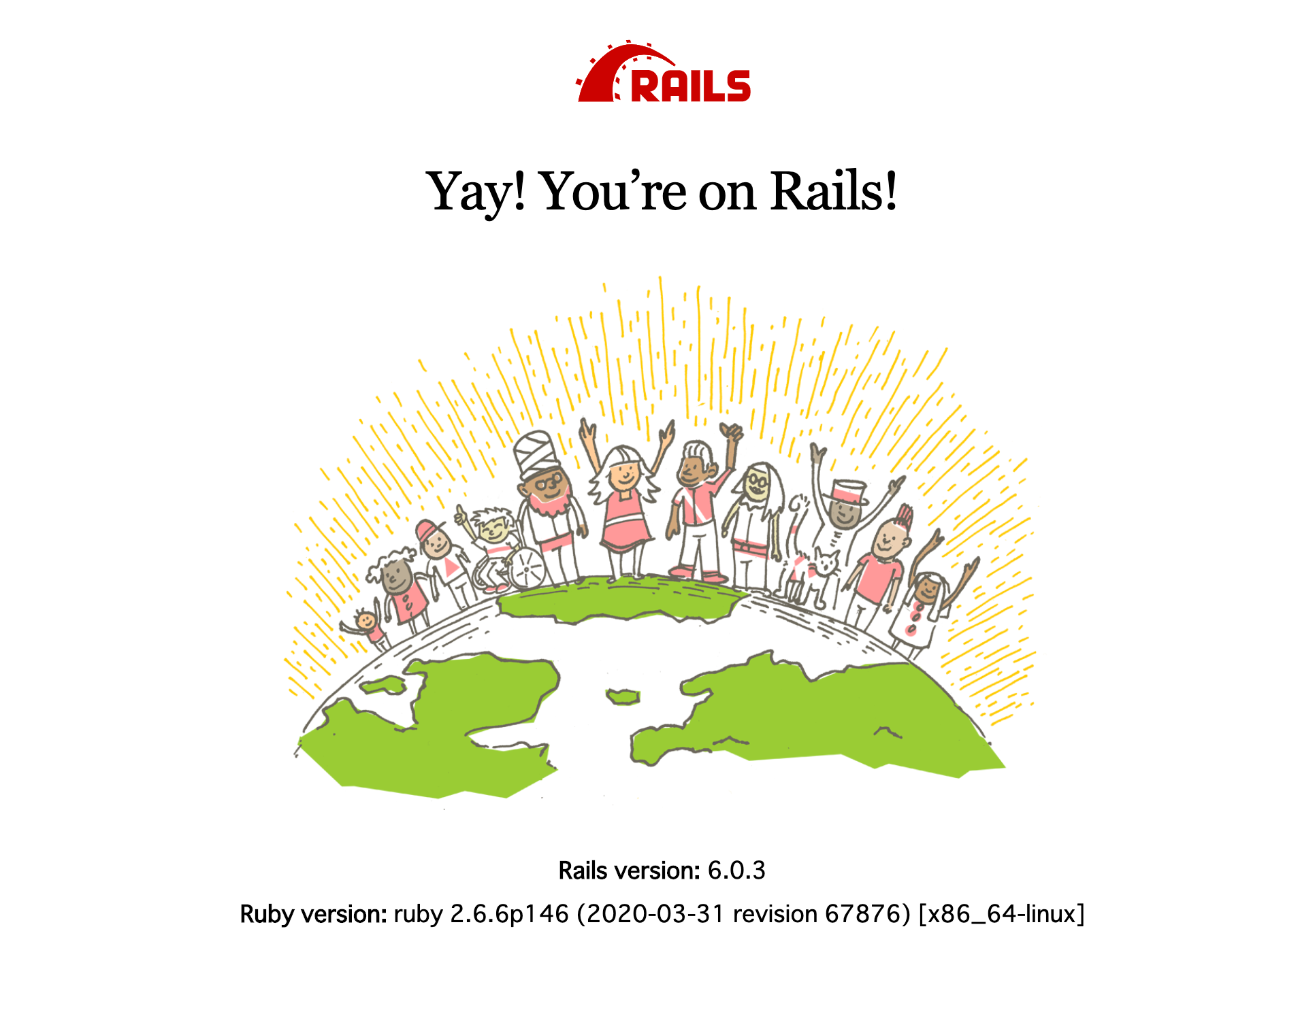
現在ポート 4000 でポートフォワーディングしているため、localhost:4000にアクセスすると下記のような画面になります。
これで Rails の開発環境構築ができました。

Nuxt の環境構築
create-nuxt-app
今回は、create-nuxt-app コマンドを使用して Nuxt のプロジェクトを作成します。
Rails のプロジェクト内, todo-app ディレクトリで下記のコマンドを実行してください。
yarn create nuxt-app frontend
今回、コードフォーマッターに Prettier、リンターツールに ESLint を使用しています。
また、API 通信をするために Axios, 画面をいい感じにしてくれる Vuetify を予めインストールとセッティングをするようにします。開発モードはSPAモードで選択します。
上記のコマンドを実行後、色々聞かれるので下記のような選択をするようにしてください。
   Generating Nuxt.js project in frontend
? Project name: frontend
? Programming language: JavaScript
? Package manager: Yarn
? UI framework: Vuetify.js
? Nuxt.js modules: Axios
? Linting tools: ESLint, Prettier
? Testing framework: Jest
? Rendering mode: Single Page App
? Deployment target: Server (Node.js hosting)
? Development tools: (Press <space> to select, <a> to toggle all, <i> to invert selection)
? Continuous integration: None
? Version control system: None
dockerfile 作成
Nuxt プロジェクト作成後、作成された Nuxt プロジェクト内で Dockerfile を作成します。
todo-app/frontend/dockerfile
FROM node:12.16.3

RUN mkdir /app
WORKDIR /app

COPY package.json /app/
COPY package.lock.json /app/

RUN yarn install
docker-compose.yml を編集
先程作成した docker-compose.yml ファイルに下記を追加してください。
frontend:
  container_name: todo-app-frontend
  build: ./frontend/
  image: todo-app-frontend
  environment:
    - NODE_ENV=development
    - NUXT_HOST=0.0.0.0
    - NUXT_PORT=3000
    - TODO_APP_API_HOST=http://localhost:4000
    - TODO_APP_FRONT_HOST=http://localhost:3000
  volumes:
    - ./frontend:/app:cached
  ports:
    - 3000:3000
  command: "yarn run dev"
  networks:
    app_net:
      ipv4_address: "172.10.0.4"
  depends_on:
    - backend
    - db
docker-compose build コマンドで dockerfile で定義したイメージのビルドを行って下さい。
docker-compose build
では、コンテナを再度起動してみましょう。
docker-compose up
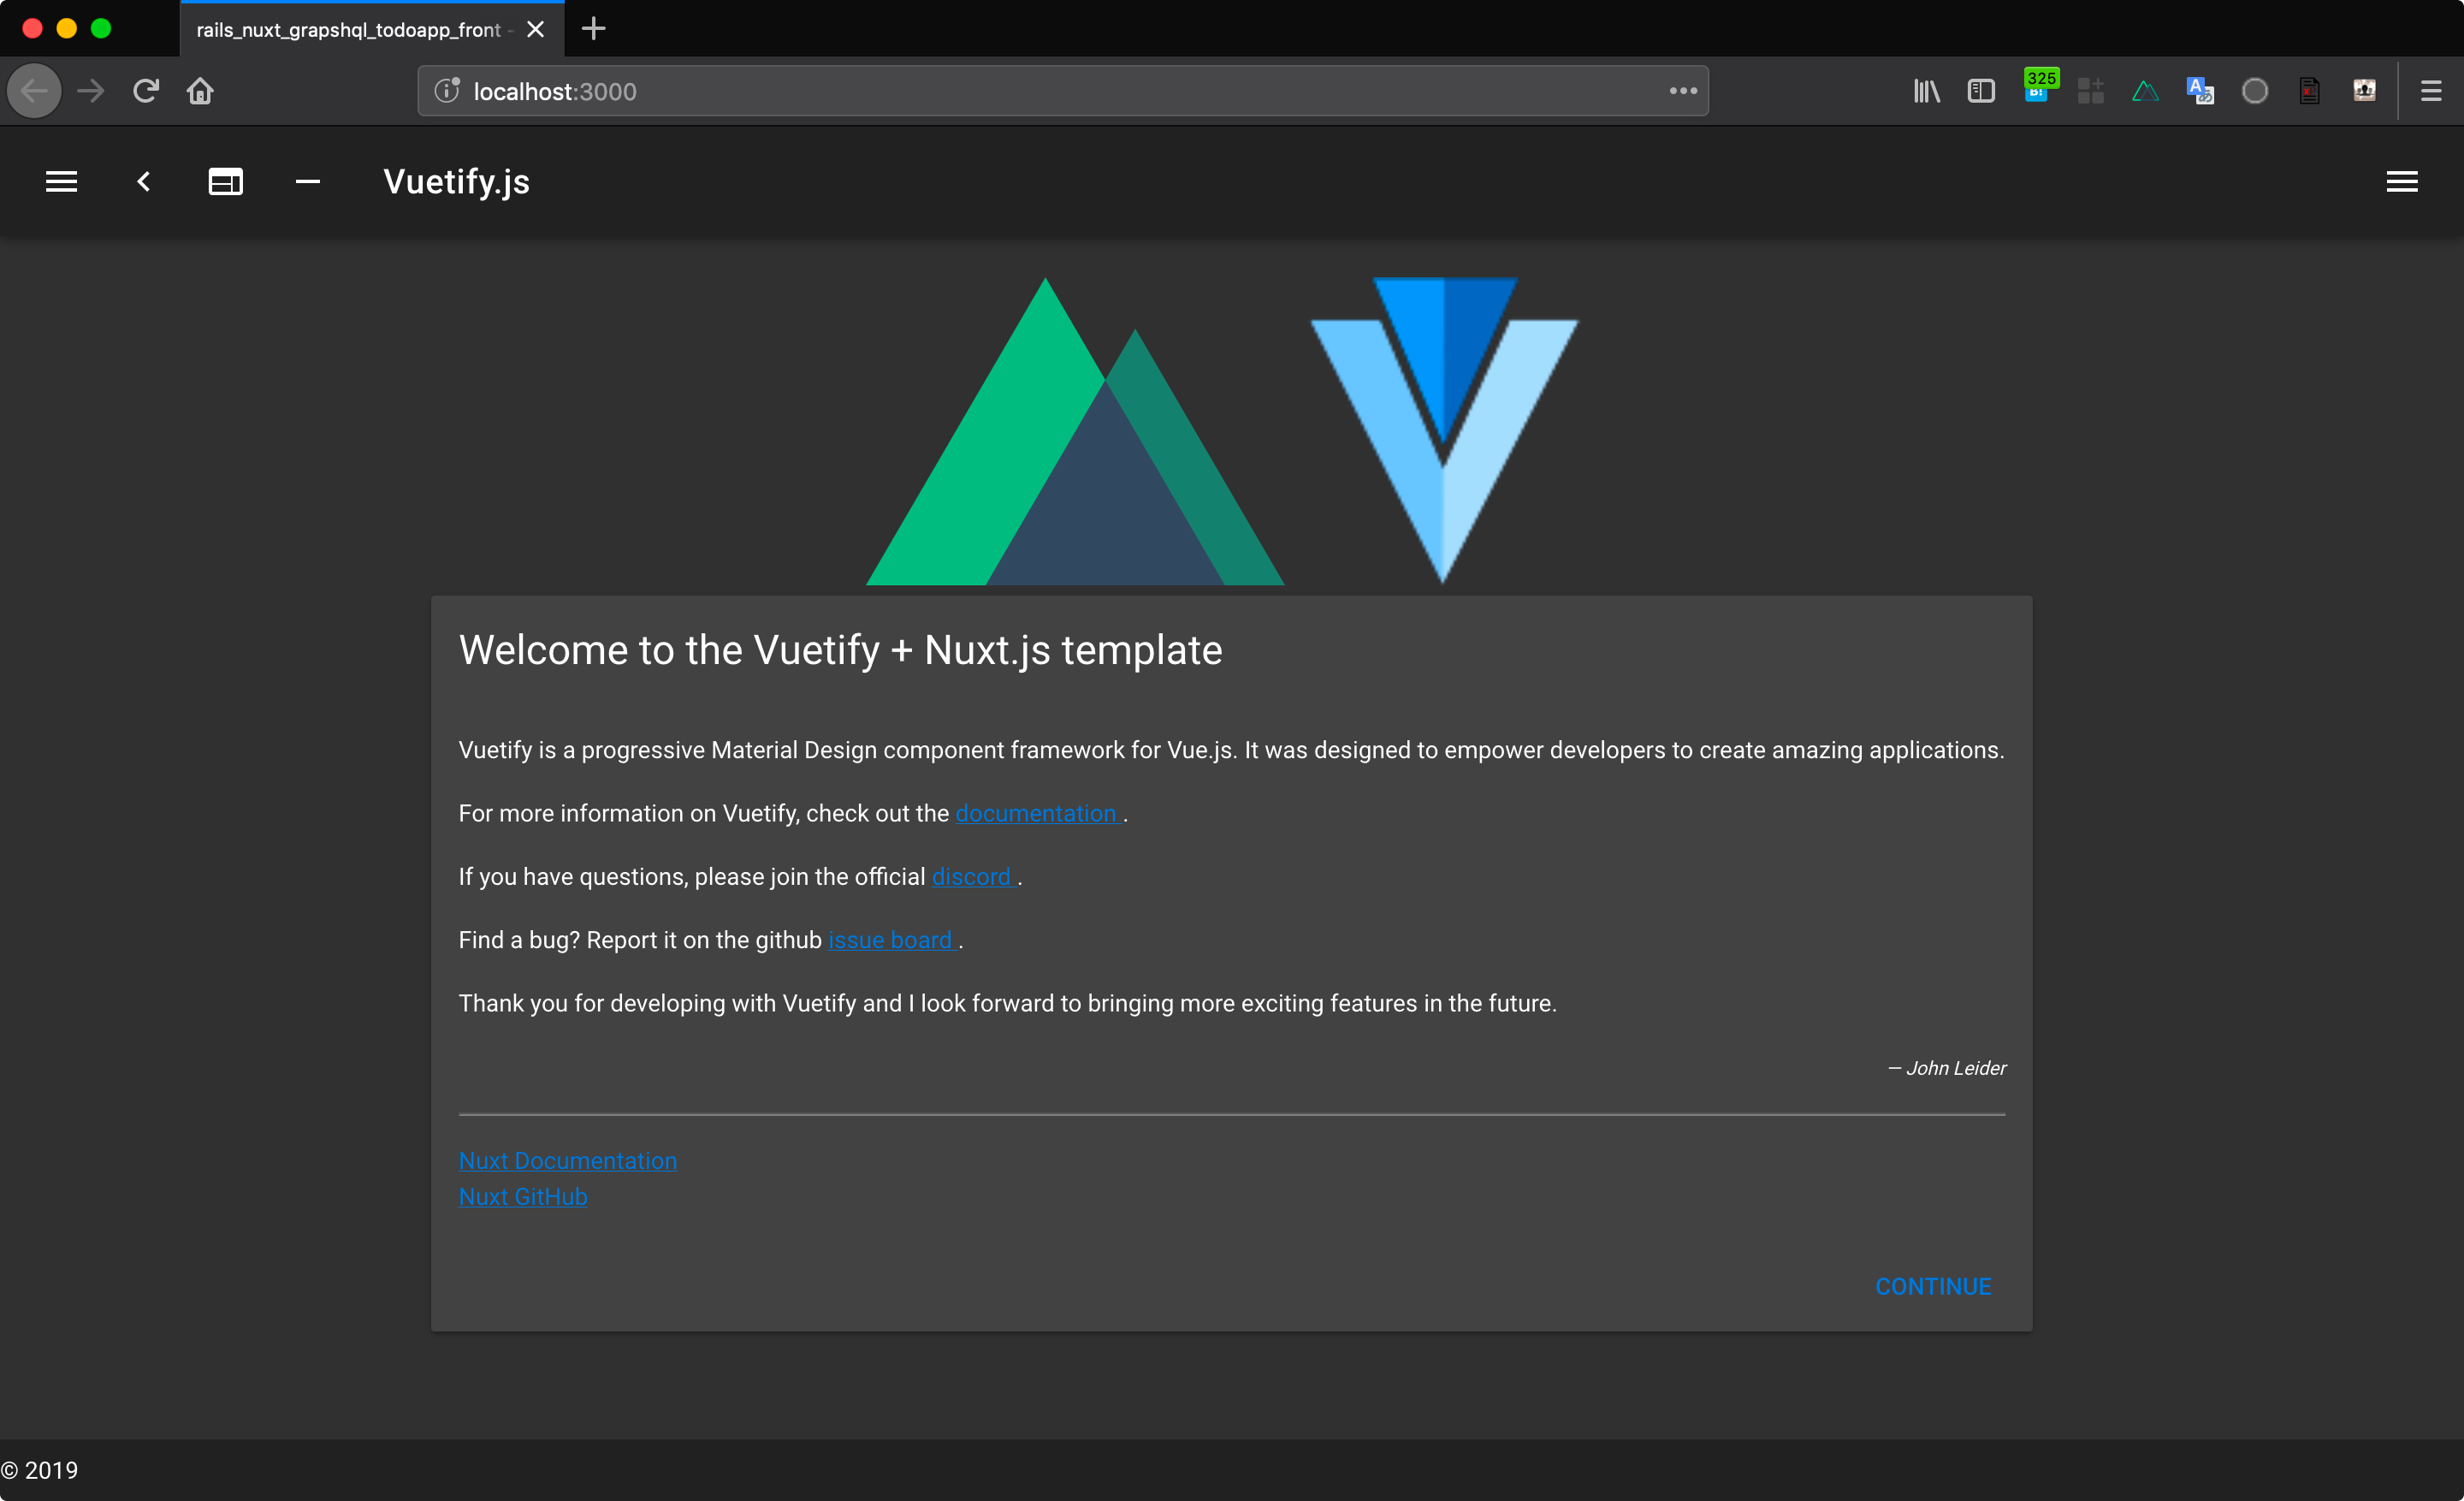
現在ポート 3000 でポートフォワーディングしているため、localhost:3000 にアクセスすると下記のような画面になります。 以上で Nuxt 環境構築になります。

これで Nuxt の開発環境構築ができました。
開発
Rails
まずは Rails 側で Todo アプリの API を作っていきます。
Model 生成
下記のコマンドを実行して Todo モデルを生成してください。
bundle exec rails g model Todo
作成した Todo モデルに簡易的にバリデーションを設定しておきます(この辺は好みで設定してください)
app/models/todo.rb
class Todo < ApplicationRecord
  validates :title, presence: true, length: { maximum: 80 }
  validates :content, presence: true
  validates :date, presence: true
  validates :time, presence: true
end
データベース作成
今回、データベースの構成は簡易的なものとします。
生成後、db/migrate以下にマイグレーションファイルが生成されますので、生成されたマイグレーションファイルを以下のように記述して下さい。
class CreateTodos < ActiveRecord::Migration[6.0]
  def change
    create_table :todos do |t|
      t.string :title
      t.text :content
      t.boolean :is_done, default: false
      t.date :date
      t.time :time
      t.timestamps
    end
  end
end
記述したら、下記のコマンドでテーブルを作成します。
docker-compose exec backend bundle exec rails db:migrate
データベースが作成できました。
ActiveModelSerializer の導入
今回作成した時刻を保持する time カラムは、そのままではデフォルトで日付も返ってしまうため、time 型を時刻にフォーマットして JSON を返すようにします。
ActiveModelSerializerという Gem を使用して、時刻にフォーマットして Todo モデルを JSON へシリアライズするようにします。
gem 'active_model_serializers', require: true
bundle install
ActiveModelSerializer のインストールが完了したら、下記のコマンドを実行します。
bundle exec rails g serializer Todo
todo_serializer.rbファイルがapp/serializersディレクトリ以下に作成されるので下記の処理を追加します。
app/serializers/todo_serializer.rb
class TodoSerializer < ActiveModel::Serializer
  attributes :id, :title, :content, :is_done, :date
  attribute :time do
    unless object.time.nil?
      object.time.strftime("%R")
    end
  end
end
Controller の作成
次にコントローラーを作成していきます。
bundle exec rails g controller api/v1/todos
作成したコントローラーに CRUD 処理を追加していきます。
app/controllers/api/v1/todos_controller.rb
class Api::V1::TodosController < ApplicationController
  def index
    todos = Todo.all.order(created_at: :desc)
    render json: todos, each_serializer: TodoSerializer
  end

  def show
    todo = Todo.find_by(id: params[:id])
    unless todo.nil?
      render json: todo
    else
      render json: { error_message: 'Not Found'}
    end
  end

  def create
    todo = Todo.new(set_params)
    if todo.save
      render json: { success_message: '保存しました' }
    else
      render json: todo.errors.messages
    end
  end

  def update
    todo = Todo.find(params[:id])
    if todo.update(set_params)
      render json: { success_message: '更新しました' }
    else
      render json: todo.errors.messages
    end
  end

  def destroy
    todo = Todo.find(params[:id])
    todo.destroy
    render json: { success_message: '削除しました' }
  end

  private
  def set_params
    params.require(:todo).permit(:title, :content, :is_done, :date, :time)
  end
end
ルーティングの追加
次にルーティングを設定します。
config/routes.rb
Rails.application.routes.draw do
  namespace :api do
    namespace :v1 do
      resources :todos
    end
  end
end
CORS 設定
最後に、rack-corsという gem をインストールして、CORS の設定します。
Gemfile
gem 'rack-cors'
bundle install
インストールが完了しましたら、config/application.rbに下記の処理を追記してください。
コンテナ起動時やイメージのビルド時にCORS_ALLOWED_ORIGINSという環境変数に本番環境や開発環境で使用するフロントエンド側のオリジンを渡すようにしておきます。
config.x.cors_allowed_origins = ENV.fetch('CORS_ALLOWED_ORIGINS', 'localhost:3000')
次に、config/initializers/cors.rb に下記を追記してください。
config/initializers/cors.rb
# Be sure to restart your server when you modify this file.

# Avoid CORS issues when API is called from the frontend app.
# Handle Cross-Origin Resource Sharing (CORS) in order to accept cross-origin AJAX requests.

# Read more: https://github.com/cyu/rack-cors

Rails.application.config.middleware.insert_before 0, Rack::Cors do
  allow do
    origins Rails.application.config.x.cors_allowed_origins
    resource '*',
      headers: :any,
      methods: [:get, :post, :put, :patch, :delete, :options, :head]
  end
end
ここまで完了しましたら一度ターミナルで curl してみましょう。
curl -X POST -H "Content-Type: application/json" -d '{"title":"のぎおび配信を見る","content":"今日は遠藤さくらちゃんが担当","is_done":false,"date":"2020-11-30","time":"1:00"}' localhost:4000/api/v1/todos
下記のようなレスポンスが来ているか確認してください。
{"success_message":"保存しました"}%
以上が Rails API の部分になります。
Nuxt
nuxt.config.js
まずは、下記のnuxt.config.js を参照してください。
今回、追記した部分はenvプロパティとaxiosプロパティです。
envプロパティでは、Nuxt のバックエンドとフロントエンドで共有する環境変数を定義できます。
Docker-compose で起動時に渡している、TODO_APP_FRONT_HOSTと、TODO_APP_API_HOSTを process.env で参照してenvプロパティに渡しています。
import colors from "vuetify/es5/util/colors";

export default {
  // Disable server-side rendering (https://go.nuxtjs.dev/ssr-mode)
  ssr: false,
  telemetry: false,
  // Global page headers (https://go.nuxtjs.dev/config-head)
  head: {
    titleTemplate: "%s - frontend",
    title: "frontend",
    meta: [
      { charset: "utf-8" },
      { name: "viewport", content: "width=device-width, initial-scale=1" },
      { hid: "description", name: "description", content: "" },
    ],
    link: [{ rel: "icon", type: "image/x-icon", href: "/favicon.ico" }],
  },

  // definition fronend env
  env: {
    hostUrl: process.env.TODO_APP_FRONT_HOST,
    apiUrl: process.env.TODO_APP_API_HOST,
  },

  // Global CSS (https://go.nuxtjs.dev/config-css)
  css: [],

  // Plugins to run before rendering page (https://go.nuxtjs.dev/config-plugins)
  plugins: [],

  // Auto import components (https://go.nuxtjs.dev/config-components)
  components: true,

  // Modules for dev and build (recommended) (https://go.nuxtjs.dev/config-modules)
  buildModules: [
    // https://go.nuxtjs.dev/eslint
    "@nuxtjs/eslint-module",
    // https://go.nuxtjs.dev/vuetify
    "@nuxtjs/vuetify",
  ],

  // Modules (https://go.nuxtjs.dev/config-modules)
  modules: [
    // https://go.nuxtjs.dev/axios
    "@nuxtjs/axios",
  ],

  // Axios module configuration (https://go.nuxtjs.dev/config-axios)s
  axios: {
    baseURL: process.env.TODO_APP_API_HOST,
  },

  // Vuetify module configuration (https://go.nuxtjs.dev/config-vuetify)
  vuetify: {
    customVariables: ["~/assets/variables.scss"],
    theme: {
      dark: true,
      themes: {
        dark: {
          primary: colors.blue.darken2,
          accent: colors.grey.darken3,
          secondary: colors.amber.darken3,
          info: colors.teal.lighten1,
          warning: colors.amber.base,
          error: colors.deepOrange.accent4,
          success: colors.green.accent3,
        },
      },
    },
  },

  // Build Configuration (https://go.nuxtjs.dev/config-build)
  build: {},
};
デフォルト画面の作成
今回は Nuxt のセットアップ時に Vuetify を選択しているため、予め Vuetify が動くようになっています。
まずはデフォルト画面を作成していきます。
frontend/components/SideNav.ue
<template>
  <v-navigation-drawer :value="drawer" app>
    <v-list>
      <v-list-item
        v-for="(item, i) in items"
        :key="i"
        :to="item.to"
        router
        exact
      >
        <v-list-item-action>
          <v-icon>{{ item.icon }}</v-icon>
        </v-list-item-action>
        <v-list-item-content>
          <v-list-item-title v-text="item.title" />
        </v-list-item-content>
      </v-list-item>
    </v-list>
  </v-navigation-drawer>
</template>
<script>
export default {
  props: {
    drawer: {
      type: Boolean,
      required: true,
      default: false,
    },
    items: {
      type: Array,
      required: true,
      default: () => {
        return [];
      },
    },
  },
};
</script>
上記はサイドナビゲーションメニューのコンポーネントになっています。
v-navigation-drawer という Vuetify のコンポーネントを使用しています。また drawer という data プロパティがサイドナビゲーションの開閉状態を管理しています。今回は、default.vueが親コンポーネントでSideNav.vueが子要素の関係に当たります。ですので、状態管理を親コンポーネントで行い、子コンポーネントに Props で渡しています。そして、子コンポーネント側で v-model を使用して状態を変更せずに、子コンポーネント側から親コンポーネントへ emit して親コンポーネントで状態を変更しています。
上記で作成したサイドナビゲーションのコンポーネントをデフォルト画面である、default.vueでインポートして、ヘッダー部分のv-app-bar内で呼び出してあげます。
v-app-barはヘッダー部分、v-mainがmain部分、v-footerがフッター部分になります。
frontend/layouts/default.vue
<template>
<v-app dark>
<side-nav-menu :drawer="drawer" :items="loggedInItems" />
<v-app-bar fixed app>
<v-app-bar-nav-icon @click.stop="drawer = !drawer" />
<v-toolbar-title
style="cursor: pointer"
@click="$router.push('/todos')"
v-text="title"
/>
</v-app-bar>
<v-main>
<v-container>
<nuxt />
</v-container>
</v-main>
<v-footer :absolute="!fixed" app>
<span>© {{ new Date().getFullYear() }}</span>
</v-footer>
</v-app>
</template>
<script>
import SideNavMenu from "../components/SideNav";
export default {
components: {
"side-nav-menu": SideNavMenu,
},
data() {
return {
title: "Sample TodoApp",
drawer: false,
fixed: false,
loggedInItems: [
{
icon: "mdi-apps",
title: "Todo一覧",
to: "/todos",
},
{
icon: "mdi-apps",
title: "Todoを追加する",
to: "/todo",
},
],
};
},
};
</script>
トップページの作成
次にトップページ画面を作成していきます。
frontend/components/TodoTop.vue
<template>
  <v-row>
    <v-col cols="7">
      <v-btn class="ma-2" color="info" large @click="$router.push('/todo')">
        新規作成
      </v-btn>
    </v-col>
    <v-col cols="5">
      <v-switch label="完了済み" @change="switchTaskStatus"></v-switch>
    </v-col>
  </v-row>
</template>
<script>
export default {
  methods: {
    switchTaskStatus(value) {
      this.$emit("switchTaskStatus", value);
    },
  },
};
</script>
frontend/components/TodoCard.vue
<template>
  <v-row>
    <v-col cols="12">
      <v-card elevation="2" outlined :light="true">
        <v-card-title>{{ todoTitle }}</v-card-title>
        <v-card-subtitle>{{ todoDate }} {{ todoTime }}に開始</v-card-subtitle>
        <v-card-text>{{ todoContent }}</v-card-text>
        <v-card-actions>
          <v-spacer></v-spacer>
          <v-btn depressed color="error" @click="remove()"> 削除する </v-btn>
          <v-btn depressed color="info" @click="toEdit()"> 編集する </v-btn>
          <v-btn
            v-if="!todo.is_done"
            depressed
            color="primary"
            @click="complete()"
          >
            完了
          </v-btn>
          <v-btn v-else depressed color="warning" @click="incomplete()"
            >未完了</v-btn
          >
        </v-card-actions>
      </v-card>
    </v-col>
  </v-row>
</template>
<script>
export default {
  props: {
    todo: {
      type: Object,
      required: true,
      default: () => [],
    },
  },
  computed: {
    todoTitle() {
      return this.todo.title;
    },
    todoContent() {
      return this.todo.content;
    },
    todoDate() {
      return this.todo.date;
    },
    todoTime() {
      return this.todo.time;
    },
  },
  methods: {
    toEdit() {
      this.$router.push(`/todos/${this.todo.id}`);
    },
    async complete() {
      await this.$axios.$patch(`/api/v1/todos/${this.todo.id}`, {
        is_done: true,
      });
      window.location.href = process.env.hostUrl + "/todos";
    },
    async incomplete() {
      await this.$axios.$patch(`/api/v1/todos/${this.todo.id}`, {
        is_done: false,
      });
      window.location.href = process.env.hostUrl + "/todos";
    },
    async remove() {
      const confirmation = window.confirm("本当に削除しますか?");
      if (confirmation) {
        await this.$axios.$delete(`/api/v1/todos/${this.todo.id}`);
        window.location.href = process.env.hostUrl + "/todos";
      }
    },
  },
};
</script>
今回、フロントエンドでは/todosにアクセスすると Todo 一覧画面を返すようにするため、pages ディレクトリ以下で、todos ディレクトリを作成してください。
frontend/pages/todos/index.vue
<template>
  <div>
    <todo-top @switchTaskStatus="switchTaskStatus" />
    <todo-card v-for="todo in todoData" :key="todo.id" :todo="todo" />
  </div>
</template>
<script>
import TodoTop from "../../components/TodoTop";
import TodoCard from "../../components/TodoCard";
export default {
  components: {
    "todo-top": TodoTop,
    "todo-card": TodoCard,
  },
  data() {
    return {
      initData: [],
      todoData: [],
      isDone: false,
    };
  },
  async created() {
    await this.$axios.$get("/api/v1/todos").then((res) => {
      this.initData = res;
      this.todoData = res.filter((data) => {
        return data.is_done === false;
      });
    });
  },
  methods: {
    switchTaskStatus(value) {
      this.todoData = this.initData.filter((data) => {
        return data.is_done === value;
      });
    },
  },
};
</script>
これにより localhost:3000/todos にアクセスすると先程のデモ画面が出てきます。
フォーム画面作成
次に、フォーム画面のコンポーネントを作成します。
バリデーションエラーメッセージの表示は今回、雑にwindow.alertで表示させていますが、好みで編集してください。
frontend/components/TodoForm.vue
<template>
  <v-row>
    <v-col cols="12">
      <v-form>
        <v-text-field
          label="Todo"
          :value="title"
          @change="(value) => (title = value)"
        >
        </v-text-field>
      </v-form>
    </v-col>
    <v-col cols="6">
      <v-menu
        ref="menu"
        v-model="menu"
        :close-on-content-click="false"
        :return-value.sync="date"
        transition="scale-transition"
        offset-y
        min-width="290px"
        :light="true"
      >
        <template v-slot:activator="{ on }">
          <v-text-field
            v-model="date"
            label="Picker in Date"
            readonly
            v-on="on"
          ></v-text-field>
        </template>
        <v-date-picker v-model="date" no-title scrollable>
          <v-spacer></v-spacer>
          <v-btn text color="primary" @click="menu = false">Cancel</v-btn>
          <v-btn text color="primary" @click="$refs.menu.save(date)">OK</v-btn>
        </v-date-picker>
      </v-menu>
    </v-col>
    <v-col cols="6">
      <v-menu
        ref="timeMenu"
        v-model="menu2"
        :close-on-content-click="false"
        :return-value.sync="time"
        transition="scale-transition"
        offset-y
        min-width="290px"
        :light="true"
      >
        <template v-slot:activator="{ on }">
          <v-text-field
            v-model="time"
            label="Picker in Time"
            readonly
            v-on="on"
          ></v-text-field>
        </template>
        <v-time-picker v-model="time">
          <v-spacer></v-spacer>
          <v-btn text color="primary" @click="menu2 = false">Cancel</v-btn>
          <v-btn text color="primary" @click="$refs.timeMenu.save(time)"
            >OK</v-btn
          >
        </v-time-picker>
      </v-menu>
    </v-col>
    <v-col cols="12">
      <v-textarea v-model="description" color="teal">
        <template v-slot:label>
          <div>description <small>(optional)</small></div>
        </template>
      </v-textarea>
    </v-col>
    <v-col cols="12">
      <v-card-actions>
        <v-spacer></v-spacer>
        <v-btn color="error" @click="remove()"> 取り消す </v-btn>
        <v-btn color="primary" @click="submit()">送信</v-btn>
      </v-card-actions>
    </v-col>
  </v-row>
</template>
<script>
export default {
  props: {
    todoId: {
      type: String,
      required: false,
      default: "",
    },
  },
  data() {
    return {
      title: "",
      date: "",
      time: "",
      description: "",
      menu: false,
      menu2: false,
    };
  },
  async created() {
    if (this.todoId) {
      await this.$axios.$get(`api/v1/todos/${this.todoId}`).then((res) => {
        this.title = res.title;
        this.date = res.date;
        this.time = res.time;
        this.description = res.content;
      });
    }
  },
  methods: {
    submit() {
      const params = {
        title: this.title,
        content: this.description,
        date: this.date,
        time: this.time,
      };
      this.todoId ? this.update(params, this.todoId) : this.create(params);
    },
    remove() {
      this.title = "";
      this.description = "";
      this.date = "";
      this.time = "";
    },
    create(params) {
      this.$axios.post("/api/v1/todos", params).then((res) => {
        if (res.data) {
          const errorMessage = `
            下記の部分を確認してください. \n
            タイトル: ${res.data.title}
            日付: ${res.data.date}
            時間: ${res.data.time}
            内容: ${res.data.content}
          `;
          return window.alert(errorMessage);
        }
        this.$router.push("/todos");
      });
    },
    update(params, id) {
      this.$axios.patch(`/api/v1/todos/${id}`, params).then((res) => {
        if (res.data) {
          const errorMessage = `
            下記の部分を確認してください. \n
            タイトル: ${res.data.title}
            日付: ${res.data.date}
            時間: ${res.data.time}
            内容: ${res.data.content}
          `;
          return window.alert(errorMessage);
        }
        this.$router.push("/todos");
      });
    },
  },
};
</script>
このフォーム画面のコンポーネントは、Todo 作成画面と Todo 編集画面で使用します。Todo 作成画面として、frontend/pages/todo.vue、Todo 編集画面としてfrontend/pages/todos/_id.vueを作成してください。
frontend/pages/todo.vue
<template>
  <todo-form />
</template>
<script>
import TodoForm from "../components/TodoForm";
export default {
  components: {
    "todo-form": TodoForm,
  },
};
</script>
frontend/pages/_id.vue
<template>
  <!-- todoのidを子コンポーネントに渡す -->
  <todo-form :todo-id="$route.params.id" />
</template>
<script>
import TodoForm from "../../components/TodoForm";
export default {
  components: {
    "todo-form": TodoForm,
  },
};
</script>
以上で、デモ画面のような動きをする画面ができます。各 Vuetify のコンポーネントにつきましては、この記事 を参考にしています。
ありがとうございました。
次回は、今回作成したアプリケーションを Fargate でデプロイする方法について Advent Calendar で書いていきます。 宜しくおねがいします。

fujisawaryohei
Rails/Nuxt/TypeScript
Related Posts
kta-m
2021/09/07