
Table of Contents
ReactをTypescriptのテンプレートで作成
npx create-react-app . --template typescript                                                                                                                                                                 (main)
npx: 67個のパッケージを10.515秒でインストールしました。

Creating a new React app in /Users/seike460/src/github.com/seike460/aws-amplify-sample.

Installing packages. This might take a couple of minutes.
Installing react, react-dom, and react-scripts with cra-template-typescript...

… 省略 …

You had a `README.md` file, we renamed it to `README.old.md`

Happy hacking!
これでひとまずReactが動きます。
Amplify Init
Amplify Tutorial を元に初期設定を行います。
$ amplify init
Note: It is recommended to run this command from the root of your app directory
? Enter a name for the project awsamplifysample
The following configuration will be applied:

Project information
| Name: awsamplifysample
| Environment: dev
| Default editor: Visual Studio Code
| App type: javascript
| Javascript framework: react
| Source Directory Path: src
| Distribution Directory Path: build
| Build Command: npm run-script build
| Start Command: npm run-script start

? Initialize the project with the above configuration? No
? Enter a name for the environment dev
? Choose your default editor: Vim (via Terminal, Mac OS only)
? Choose the type of app that you're building javascript
Please tell us about your project
? What javascript framework are you using react
? Source Directory Path:  src
? Distribution Directory Path: build
? Build Command:  npm run-script build
? Start Command: npm run-script start
Using default provider  awscloudformation
? Select the authentication method you want to use: AWS profile

For more information on AWS Profiles, see:
https://docs.aws.amazon.com/cli/latest/userguide/cli-configure-profiles.html

? Please choose the profile you want to use seike460-sandbox

… 省略 …

✔ Successfully created initial AWS cloud resources for deployments.
✔ Initialized provider successfully.
Initialized your environment successfully.

Your project has been successfully initialized and connected to the cloud!

Some next steps:
"amplify status" will show you what you've added already and if it's locally configured or deployed
"amplify add <category>" will allow you to add features like user login or a backend API
"amplify push" will build all your local backend resources and provision it in the cloud
"amplify console" to open the Amplify Console and view your project status
"amplify publish" will build all your local backend and frontend resources (if you have hosting category added) and provision it in the cloud

Pro tip:
Try "amplify add api" to create a backend API and then "amplify publish" to deploy everything
ここからHostingの設定を行っていきます。
Consoleで設定
Amplify Console を利用してデプロイしていきます
deployment/production ブランチを作成して、そちらが更新されたらデプロイされるように設定していきます。
seike460% amplify add hosting
? Select the plugin module to execute Hosting with Amplify Console (Managed hosting with custom domains, Continuous deployment)
? Choose a type Continuous deployment (Git-based deployments)
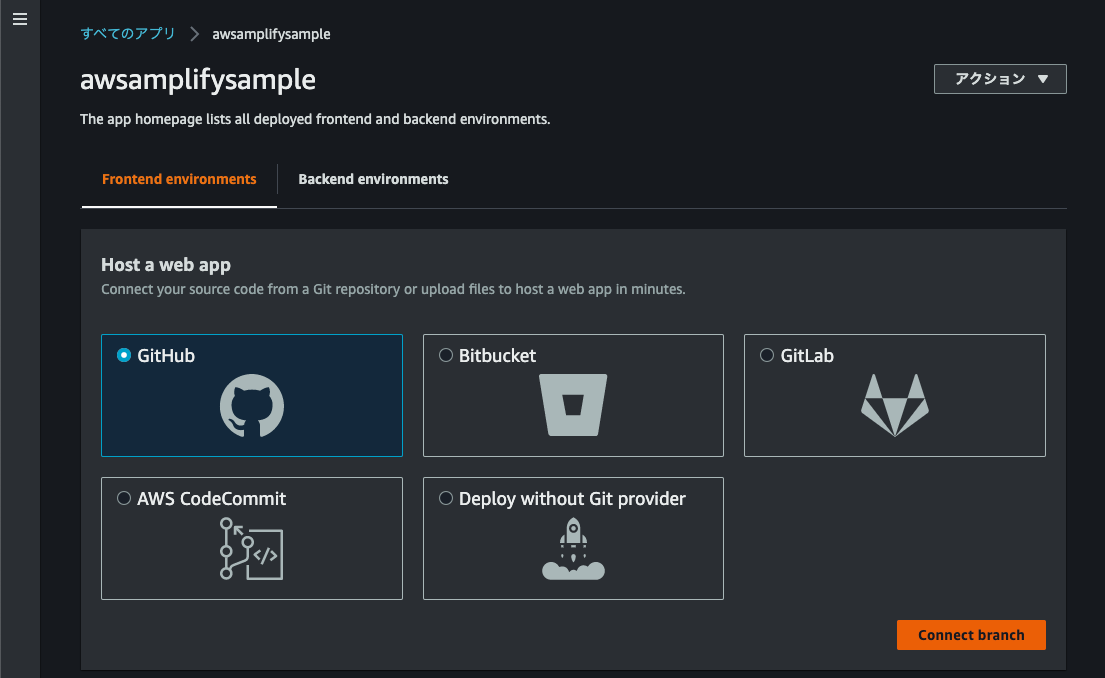
ブラウザが立ち上がりますので、コンソールでポチポチしていきます。 GitHubを利用したいのでGitHubを選択します。
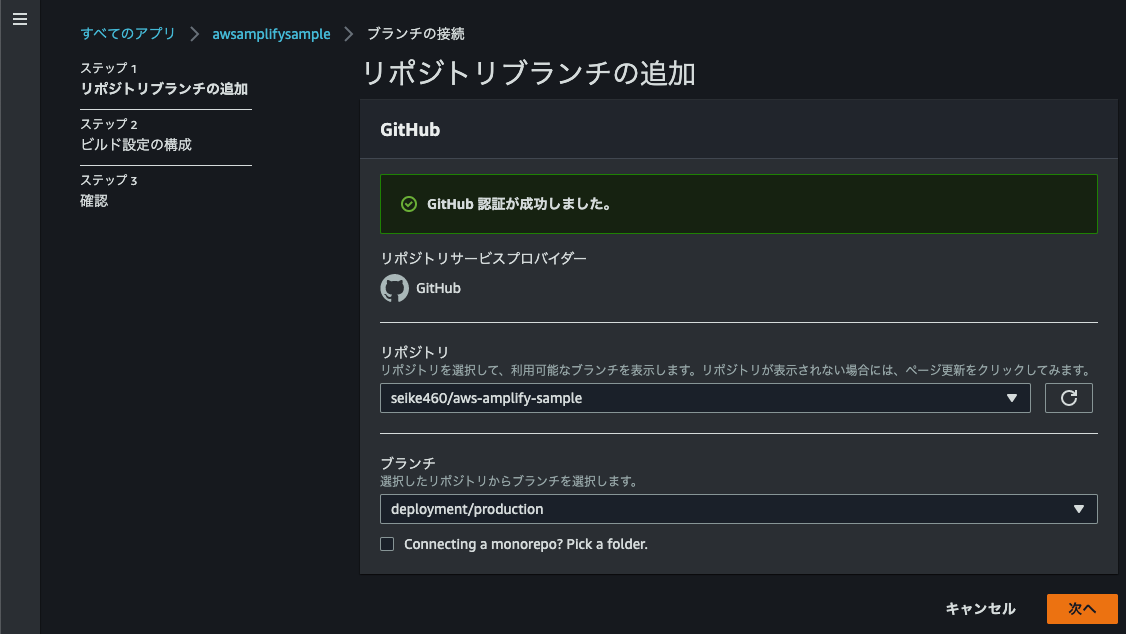
deployment/productionをデプロイする設定とします。
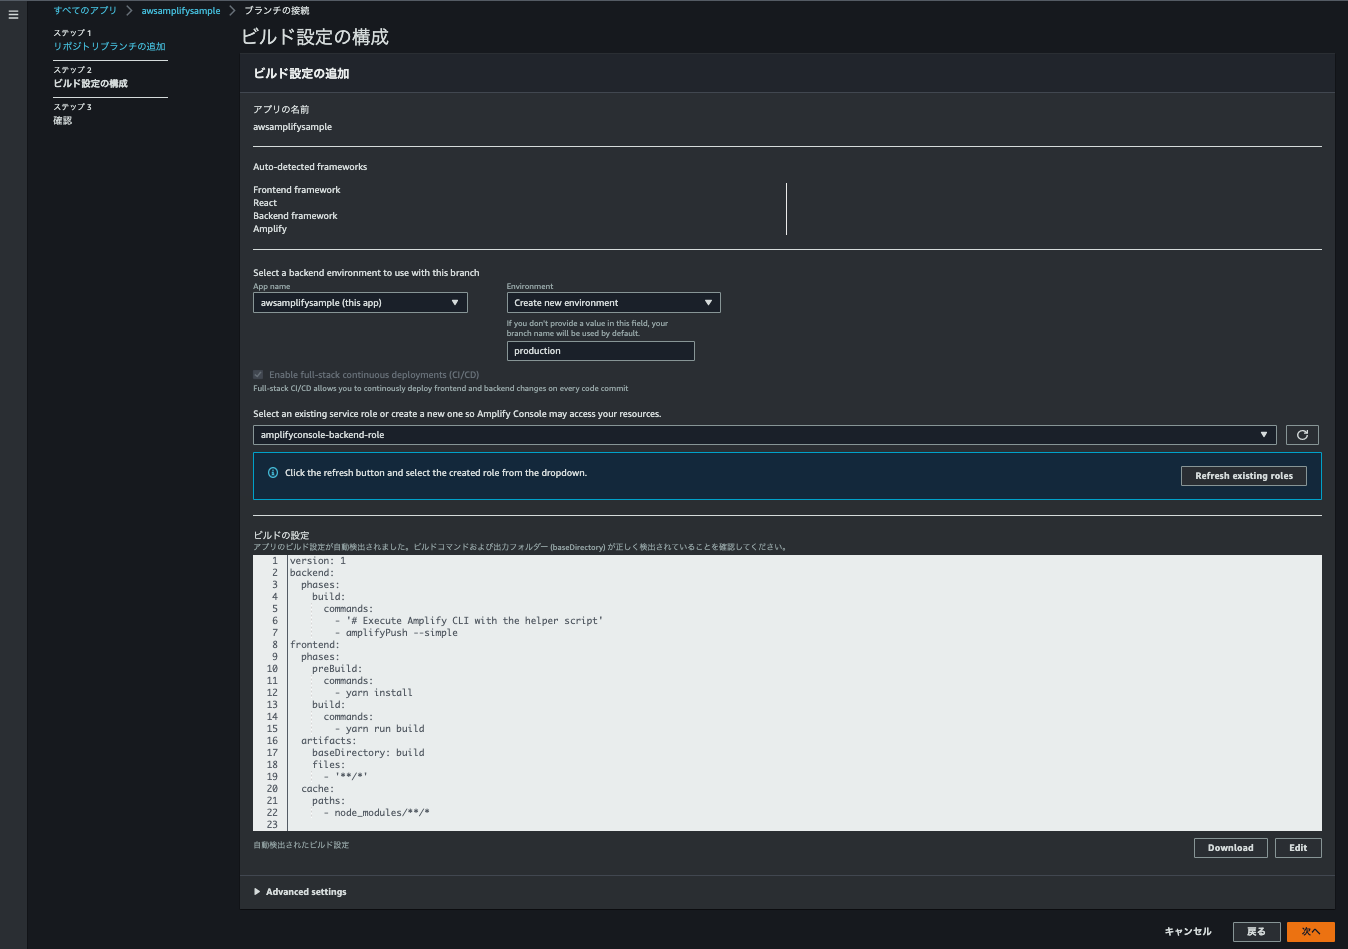
必要なIAMを生成する必要があるので、生成して利用します。 UIから作成できますが、必要なPolicyはちゃんと確認しましょう。
AWS 管理ポリシーの AdministratorAccess-Amplify が必要となります。
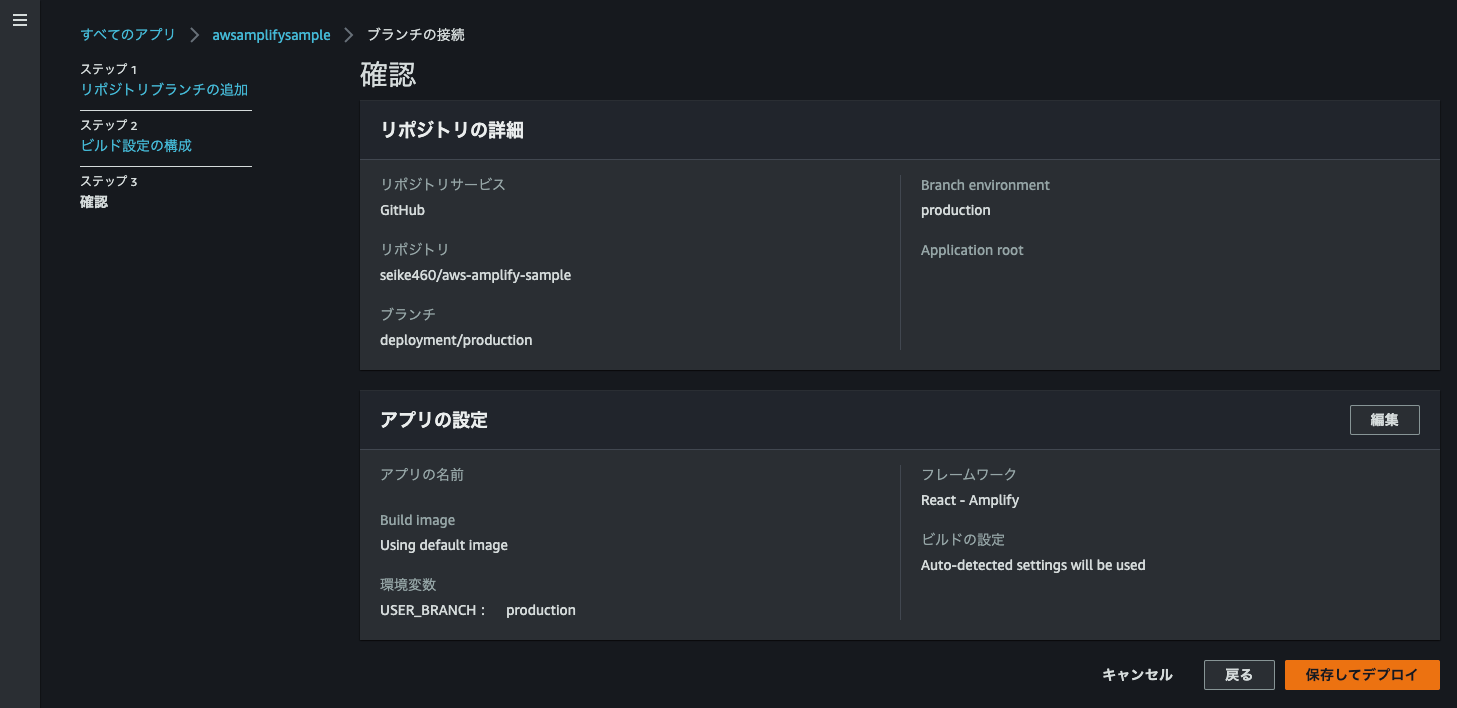
確認してデプロイします。
するとこちらの様なサイト が出来上がります。(いつか消えるかもしれません。ご了承ください。)
サイト上に実際のサンプルコードをコミットしているGitHubのリンクも置いておきます。 またなんと弊社のリクルートサイトへも飛ぶことができます。便利ですね。
まとめ
こんな感じでとりあえずHostingさせるだけなら簡単に出来てしまいます。 引き続きAWS Amplifyを利用して省力的な開発を進めて行きたいと思ってます。

shiro seike / せいけ しろう / 清家 史郎
Company:Fusic CO., LTD. Slides:slide.seike460.com blog:blog.seike460.com Program Language:PHP , Go Interest:Full Serverless Architecture
Related Posts
Daiki Urata
2024/06/10
Daiki Urata
2023/05/22